Building a floor monitor wedge is something that many of us attempt (or at least want to attempt) at one time or another.
There is great satisfaction in designing and building a wedge.
I design loudspeakers for a company, but really enjoy taking other manufacturer’s boxes apart to examine the inner construction and see how they actually put glue to wood to make the design work.
Even though some wedges are surprisingly simple in design and work just fine, other cabinets are overbuilt and end up providing the same result.
For the most part, if you’re successful at constructing a monitor wedge (which is a compound angle box using dado and rabbit joints), then you can build any loudspeaker enclosure. Rather than completely reinventing the wheel, it’s more useful to follow some basic guidelines.
Getting To Work
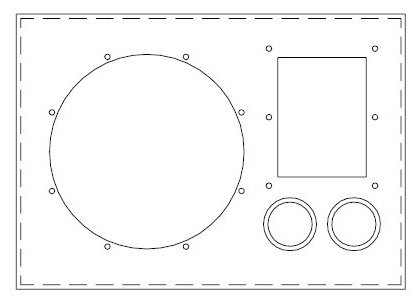
Let’s look at building a wedge out of 13-ply Baltic Birch (18 mm thick) plywood, using industry standard manufacturing tools. The enclosure will house a single 12-inch cone driver with a 2-inch horn and a pair of ports.
I’ll leave the tuning to you after you have chosen your components, because each brand of loudspeaker component presents its own unique tuning requirements.
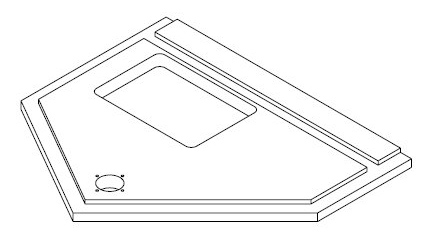
I chose this design for its versatility. It has three possible display angles: 30-, 45- and 90-degrees.
Depending upon the horn you choose, not only does it make a great floor monitor, but you can also use it as a side-fill by standing it on end, another popular use for monitors.
I’m using a DDS (Design Direct Sound) CFD-251 with a tight 51-degree horizontal by 42-degree vertical.
The connectors are positioned at either end of the cabinet, but you might run into some problems and may want to consider another location if you plan to use it for side-fill.
When designing a monitor, take a look at what’s already been designed and available on the market.
You’ll find a plethora of sizes and angles, but most builders are seeking these common design goals: small, low profile, multi-angle, light, and extremely loud and clear output.
Granted, the components you choose have an enormous effect on the quality, but for this article I’m going to focus on construction.
Keep in mind that while we’re looking at how to build a wedge to withstand the abuse of the road and outlast all of us, it’s still up to you to make your design sound good by choosing high-quality components and properly tuning the box.
First let’s choose the type of joinery we plan to use. Here are three different styles used in monitors that are on the market today, and each has its own level of difficulty in construction.
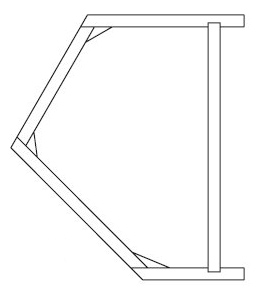
Figure 1 shows a miter joint. To make it, simply determine the angle on the corner, divide by two, and that’s the measurement for each edge angle cut. This type of joint is fine, even though it’s not as strong as others. Many low-budget monitors are built using this method.
It’s important to place a brace at each joint cut at the same angle for a tight fit, running the length of the joint to insure its strength.
Two other things to remember: recalculate the enclosure volume to compensate for the loss of internal space from adding the bracing, and be careful where connectors are mounted, because there may not be room for them after bracing id added.
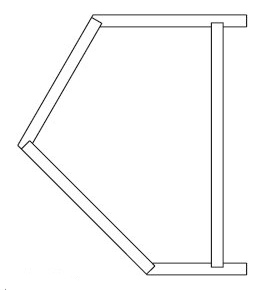
Figure 2 shows a butt joint, more commonly used because both pieces don’t need to be cut perfectly to achieve a tight joint.
The outer piece can be slightly oversized and sanded flush later. Again, this joint has strength inadequacies so additional internal bracing is advised.
Figure 3 demonstrates what we use at G-Audio, which is the dado joint. It’s a very difficult joint to make, with a lot of time required to calibrate and adjust the cutting equipment to get every angle and depth of each cut exact.
However, if done correctly, but it makes the strongest joint of the three.
Each part interlocks with the other, and in most cases, makes additional internal bracing unnecessary.
A note of caution: take care when you layout your rabbit joints assembly.


