
System tuning is something I’ve been learning about a lot recently. I’ve gained formal knowledge of the subject through books, articles, podcasts and videos, but haven’t had many opportunities to put it to use, although recently I had the occasion to measure a multi-part sound system for a college graduation ceremony in an arena.
This article is a personal review of my process for measuring that system and some reflection about improvements for the next time. I hope it can help people similar to myself who are newer to this aspect of the industry.
This was strictly measuring for my own practice, so I decided what system changes I would make – but I didn’t implement them. My goals: Create and follow a plan for measuring each part of the system as if I was going to tune it; document the experience to review later with an expert; and overall, just learn. Learn what mistakes I made and how I can improve to be faster and more accurate in the future.
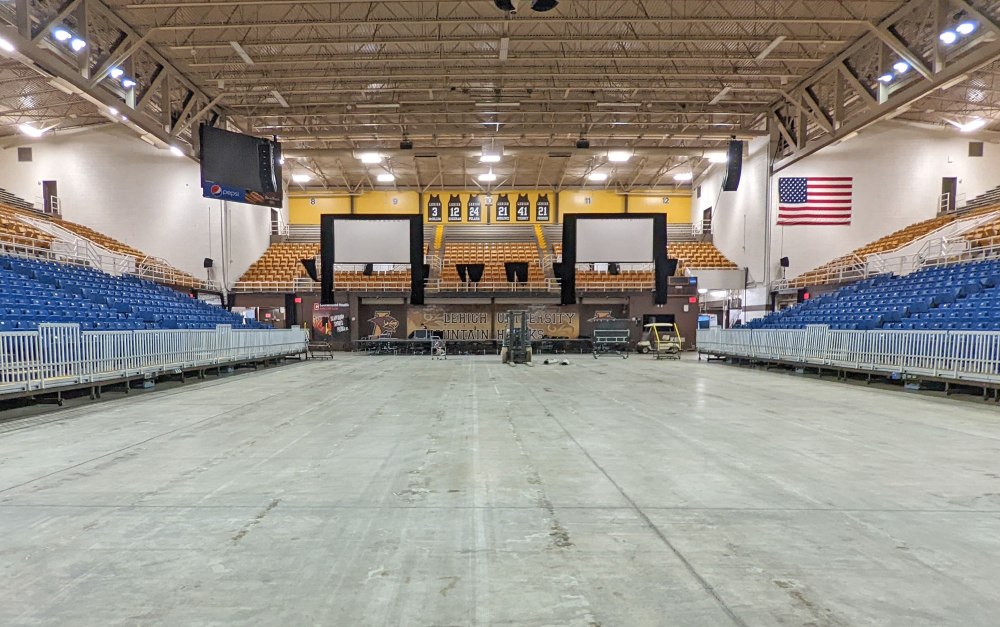
The arena seats about 6,000 people. The stage is at one of the long ends of the “bowl,” and only the seats directly behind the stage are off-limits for spectators. We weren’t using the house system for this project at all; rather, the system brought in for the event included two line arrays with eight boxes each (and driven in two zones of four) flown left and right above the stage. There were additional loudspeakers for outfill on both sides and front fill near the stage.
I didn’t do the design so had no prediction file to reference.
The Process
Employing Rational Acoustics Smaart v8 and an iSemCon EMX-7150 measurement microphone, I started with the portion of the system covering the most people – the main arrays designed to the cover the blue seats in the lower bowl as well as the main floor (with some help from front fills). I selected four points to measure the main left hang and would copy any decisions over to the right side.
These points were chosen to represent different parts of the array and its coverage, specifically, the first row closest to the loudspeakers, a middle point, front of house (for mixer perspective), and the farthest section. I began with the point closest to the hang and worked my way back.
After the second measurement (at “mid”) I noticed that I’d forgotten to turn off the right side of the PA. Curious as to how much this affected the measurements, I measured at the farthest point with both sides on and then with only the left side on. This was the point where both sides being on would change the measurement the most and after seeing the difference (Figure 1), I decided it was not impactful enough to re-measure the first two positions.
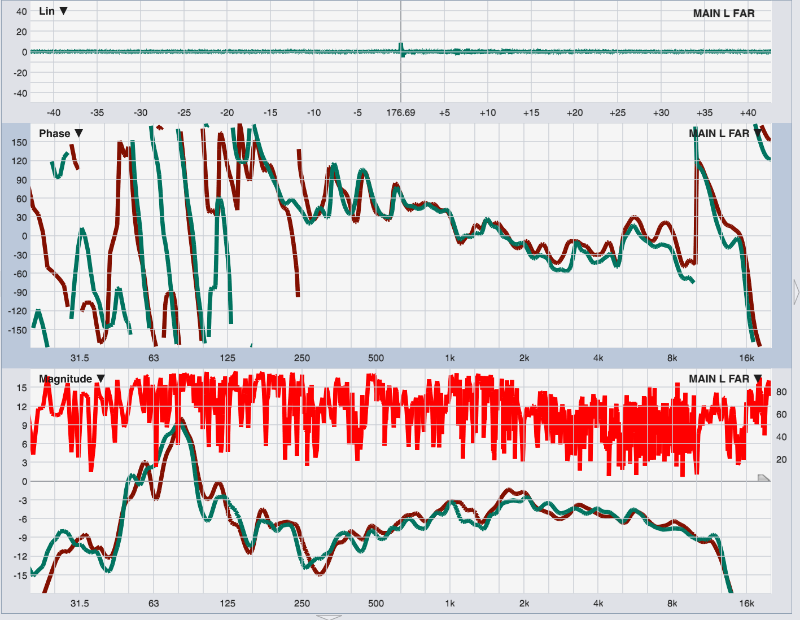
I took a pause to review data from the mains (Figure 2). Overall, the front-to-back variance wasn’t bad which means the splay angles were well chosen. I noticed there was quite a lot of buildup in the low end at all measurement points, but I didn’t think much of the dip around 250 (more on that later). Also, there was too much high-frequency energy up front and a little less in the back.

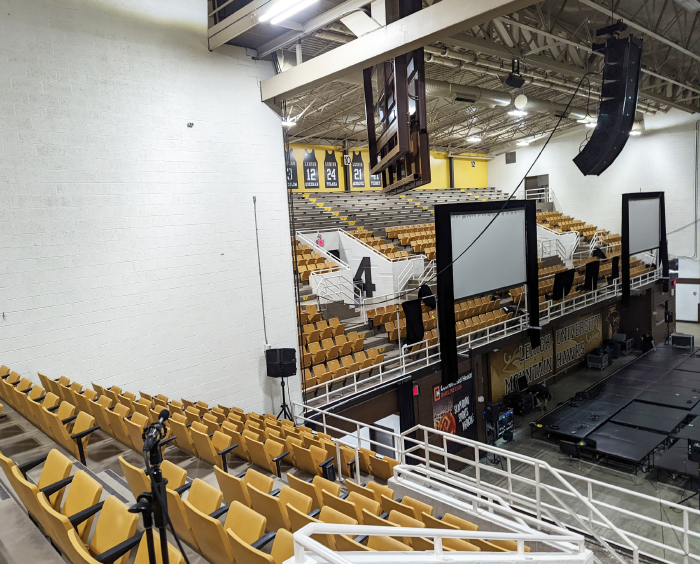
Because this was just a practice run of measurement, I didn’t implement any EQ changes and moved on to the outfills, where each side was equipped with two boxes vertically arrayed and designed to cover the first two sections all the way to the top.
I aimed the boxes down the middle of the coverage area, set a level (by ear) that felt similar to the mains at the “mid” position, and measured the magnitude response on-axis. I then tried to use my ears to find the “seam” where the main and outfill output were equal in level. I placed the mic at that seat and walked all the way back to my computer (I definitely got my steps in).
I measured both the main and outfill alone at the same position without changing anything (including delay in Smaart, which was a mistake). Unfortunately, The mic was not correctly placed – the mains and outs were off about 5 dB (Figure 3).
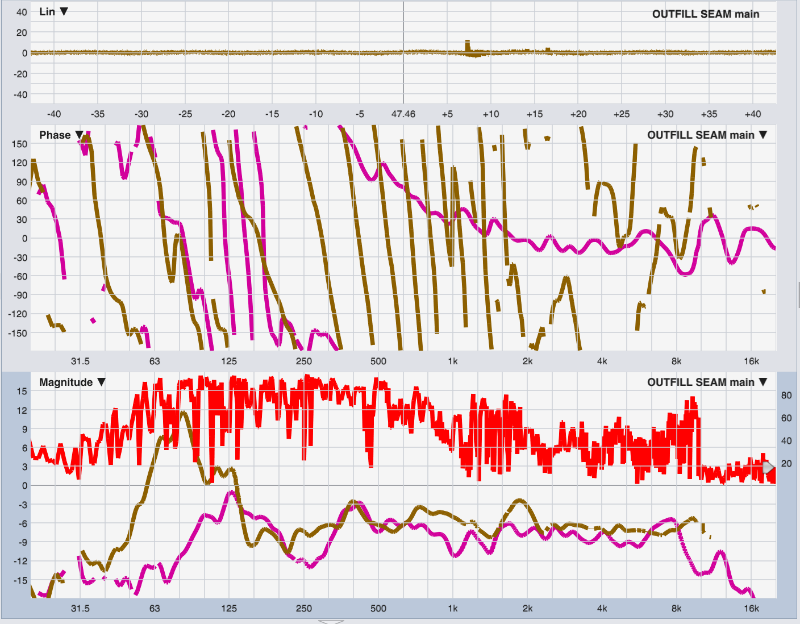
Being a bit lazy and not wanting to walk all the way back up, I just boosted the fill by 5 dB to make them even in level. Big Mistake! That erased decisions I had made earlier and I regretted it. Once they were even in level, I thought about timing decisions. Because of the front-to-back relationship between the mains and outfills, I would have had to delay the mains to get the two to match, which I was told not to do.
At this point, I would have moved to the floor to address the frontfills, but we weren’t able to put them up yet due to the stage not being done. So, I had done all I could do. I made a book report of photos, measurements, and explanations and sent it off to Michael Lawrence (my mentor on this project), so we could discuss the process.
What I Learned
First, a positive – I had a good plan. I knew what I wanted to measure and more importantly, why I wanted to measure it. Things that I saw in the data correlated to specific decisions I would make with the level and tuning.
Second, I should bring Smaart with me into the stands. Walking back to the laptop on the floor took up a lot of time and I could have eliminated some of it by taking the measurements standing next to the mic with another laptop running Smaart’s Client Window. Lesson learned.
Next, I should have looked at the data closer as I was capturing it. I would have seen that the right side of the system was on from the Live IR having two arrivals.
Obviously, I should have made sure the console/DSP EQ was off. Remember that low-mid dip in the mains measurements? Well, in passing the FOH mixer mentioned, “Yeah I’m normally pulling low end out of this PA.” Duh, I’d left the EQ on.
In terms of outfill tonality – in my head, as I was measuring the outfill on axis, I thought I would tune it to the target curve alone. I was reminded that area is also getting the low-end energy from the mains, so to get that area to the target curve, I needed to measure with the main on and then use the outfill to add in whatever was missing.
Now about the outfill seam level – looking back, I feel stupid knowing I cheated to make the seam where I put the mic. The problem is that changed the level for the whole seating area quite dramatically. The next time (with my wireless Smaart controller), I will be more precise with the seam measurement location. I also learned that I could reset the measurement delay in Smaart separately for the main and outfill at the seam measurement location.
Through this experience, I have much more appreciation for the process of measuring a complete sound system, both on-axis magnitude response and the seams where smaller systems meet. I hope you’ve also learned something from seeing my process and mistakes.
I encourage interested readers to try a similar experiment. Decide what you want to accomplish and develop a plan. If you’re new like me, take notes as soon as you can after you’re done and review it later when you have a clear head, ideally with a mentor. You’re bound to notice something later that you didn’t in the field.