As we bask in the all-enveloping glory of the digital age, it’s come to my attention that some intrepid live sound engineers are very occasionally coming across analog equipment as they travel to some of the dustier corners of the globe.
While many of us are old enough to remember these beasts, not everyone has had the opportunity to operate these relics so I thought it might be a good idea to write a guide to the “ancient art” of analog mixing.
The first thing you’ll notice when approaching an analog console is that it’s much larger than an equivalent-featured digital desk. There are also many more knobs and faders, which can be a bit daunting at first but you soon see that there’s a lot of repetition within the controls, especially when it comes to input channels.
Rather than a sensible set of single-channel controls that can be used to address any of the inputs, each individual channel has it’s own complete set of controls. This may seem wasteful and excessive, but back in the days before digital sampling it was universally agreed upon as the “best” control interface.
What it means is that there’s no longer a select button, so rather than selecting the channel to work on and then using the single-channel controls, simply select the individual channel controls of the channel you want to operate on. It may be confusing at first but is reasonably logical and easy enough to get used to.
An obvious consequence of the unnecessarily detailed control interface is a limit to the number of available input and output channels, not to mention that the configuration is fixed. The only way to alter the number of input and output channels is to disassemble the console itself, which is not something that can be done in the heat of a live show!
On the other hand, however, it’s easy to see how many input and output channels are available just by looking at the control surface (which are also conveniently numbered so you don’t have to count them). As a matter of fact, a good deal can be learned from just looking at the vast array of knobs and buttons – there’s no need to be concerned with software, menus, screens or layers because everything is right there.
Every individual function has a control so a quick glance tells everything you need to know about all of it’s capabilities. It provides the engineer with the unique ability to “see” the entire mix simply by glancing across the control surface, plus the abundance of controls enables you to quite easily manipulate the same parameter on two different channels at the same time.
Extra Components
The layout is also reasonably uniform from desk to desk. Virtually all analog boards conform to a basic design of a bank of input channels and a master section (which can be to one side or somewhere in the middle of the input channels). The master section contains sub groups, VCAs, output channel controls (auxes, matrix and masters), master meters, and anything else that isn’t an input channel. This standard design means that once you master an analog console, you can easily switch to another; the design is similar, it’s just the scale that changes.
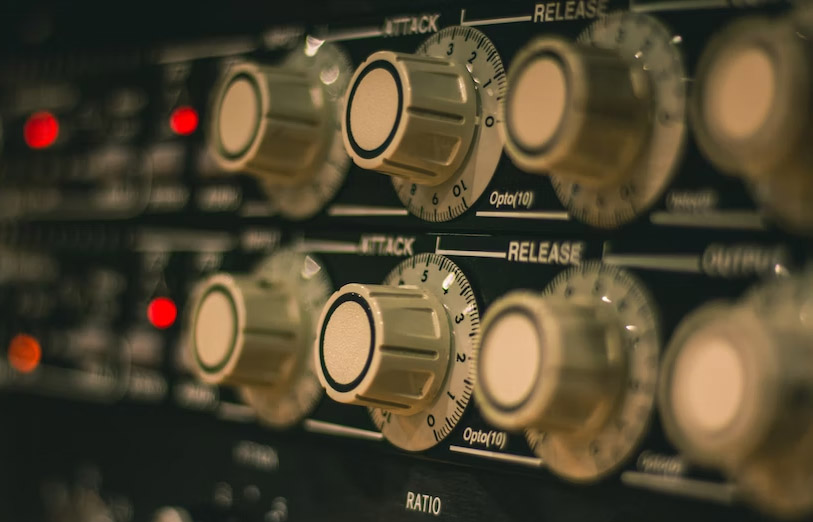
But where are the gates, comps and effects? Well, back in the analog days when you bought a mixing console, that’s what you got – preamps, channel EQ, bus routing, fader controls… and that was it. Expensive luxuries such as graphic EQs, gates, compressors and effects had to be purchased separately (which of course meant housing and shipping them separately).
And so we arrive at the wonderful world of outboard, this being the name given to any audio hardware that exists outside the mixing board. (Clever how the term was devised, no?). These devices were housed in towering racks that taxed the backs of many a roadie. Even if you’ve never seen an actual outboard rack you probably already have an idea what they look like because a lot of digital console manufacturers lovingly pay homage to these past artifacts by mimicking the look of them in their software emulations, right down to the screw holes used to mount them. (Next time you fire up a Yamaha or Midas digital console, have a look at the effects and you’ll see what I mean).
Spare a thought for the analog pioneers of old; if they wanted a graphic EQ or a reverb they couldn’t just thumb through a menu and activate a chunk of code that does the job. Instead they’d have to buy/add single-function piece of gear, mount it in a rack, and then physically wire it all in – every single time they wanted to use it. Much more thought was given to what outboard was needed, and the cost would more directly influence just how much could be deployed at any given time.
Never in all of my years of using analog consoles did I ever come across a set-up where there was enough outboard gates and compressors to have both on every single input channel. For instance, if it was a 48-channel board, there was probably up to 12 gates and 24 compressors, and unless you wanted to start crawling about inside the back of the rack and start chaining them together, it was an either/or choice, never both.
Engineers needed to think long and hard about where gates or compressors could be most effectively deployed, then someone would have to go around to the back and plug them all in to the correct channels; patching errors were common and cable faults became just another part of the job.
Many used subgroups to deploy parallel compression because they simply didn’t have enough to put one on everything that needed to be compressed. (On the plus side we all got a lot more exercise, not just as a result of walking from one end of the board to the other but also from every visit to the outboard rack to make fine tweaks.)
Ups And Downs
Another key difference to be prepared for is that analog inputs are all located on the desk itself – there are no convenient stage boxes at the end of a single, easily deployed network cable. The stage box multi-core needs to run to wherever the console is located, which can have an impact on where you choose to locate the board.
Also bear in mind that due to the physical restrictions, there’s a limit on the number of auxes. So, for example, it may not be possible to run all of your in-ear monitor mixes in stereo, or if doing monitors from front of house, you might have to trade off the number of monitor mixes to the number of FX sends. Plus no one ever managed to perfect the complex mechanical mechanism required to flip the mixes to the faders, so you’ll have to use the rotary knobs provided.
The simple fact that digital models have all but replaced their analog predecessors should be all the evidence needed to conclude that the digital approach is superior in every way, but that’s not entirely true. Analog boards are widely considered to be sonically superior, with the electronics imbuing the signal with a “warmth” that is pleasing to the ear. This is often the result of non-linearities and harmonic distortion introduced by the components themselves – essentially a flaw in the system that we grew to like.
In fact, many digital console makers now seek to emulate this “flaw” in the interest of sounding more “analog,” which if you think about it is ironic. Analog is also a lot more forgiving when it comes to levels; you can “gain up” a signal to 0 dB and beyond, and chances are it will just get warmer (up to a certain point, then it will outright distort).
Added Steps
Finally, there’s one key feature we now take for granted, the absence of which strikes absolute fear into the heart of digital engineers: analog boards have no inherent recall ability! (I will pause and let that sink in for a moment.) When we purchased a new analog console, it always came with a nice printed manual that included an outline drawing of a bunch of input channels. We would dutifully make photocopies of the drawing; they served as our recall sheets.
The sheets enabled us to physically write down the state of every single knob, button and fader so that when we returned to the board after other acts had performed, we could manually restore all of the settings to those established in the sound check. There were a few high-end desks that attempted to record the state of the controls, but it was still necessary to manually re-set every single control that had changed – there were no motorized faders or knobs.
We all knew that the chances of reproducing the exact settings from the sound check were nigh on impossible, but we all participated in this charade nonetheless. And our mixes still sounded good. Some might say it was because of the forgiving nature of analog, but I believe that our approach to mixing was different back then.
We usually built the mix from scratch every day and operated the console more like a musical instrument and less like a computer; there was less scope for precision and no ability to repeat previous mixes, so we were more inclined to go with the flow and respond in real time to what was happening on stage. This is not to say that digital engineers don’t employ similar techniques, but in the precise digital realm it’s so easy to get bogged down in the details and forget that live music is a dynamic and transient thing.
I hope that this guide has been useful for those who are emerging in the world of live sound with very little knowledge or experience of operating analog consoles and related gear. Always remember that at the end of the day, analog boards do everything their digital counterparts do, often sounding better while being less convenient to operate.


