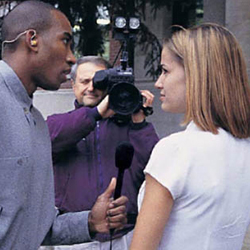
Lavalier: Another popular mic for video use is the lavalier type.
Historically, the word “lavalier” refers to microphones which are hung on a cord around the wearer’s neck, but the term has grown to include almost any small microphone that attaches to the user’s clothing.
Lavalier microphones leave the talker’s hands free to gesture, hold notes, or demonstrate a product.
In addition, they are usually very small and therefore tend to disappear on camera. Also, using a lavalier will keep the distance from the microphone to the talker’s mouth fairly constant, reducing the need for frequent mixer adjustment once the levels have been set.
A disadvantage of lavalier mics is the fact that they tend to be single-purpose microphones — they rarely sound good if handheld or used away from the body.
While the lavalier mic’s small size makes it easy to conceal behind lamps or other objects, an equalizer is usually necessary to make the mic sound natural when it is not attached to the person talking.
Tips on Using Lavalier Mics: For best results, lavalier mics should be placed on the outside of clothing, about six to eight inches below the chin.
They are generally clipped to a pocket, lapel, or necktie. If none of these options are available, the mic can also be clipped to the collar of a shirt or blouse.

Sound quality in this position tends to be somewhat muffled, however, because some high frequencies (which contain consonants) do not fully wrap around to the area under the chin.
Concealing a lavalier microphone: In some productions, it is necessary to conceal the microphone.
It is important to prevent both the microphone and the first few inches of cable from rubbing against either the body or clothing, which will cause noise. Here are some options:
– Under the shirt collar. The mic is lightly taped to the inside of a dress shirt collar, near the opening in front. The cable can be routed around to the back of the neck, over the collar and under the shirt.
– On eyeglasses, on the inside of the temple. The cable is routed over the ear and down the back.
– On the forehead or cheek, secured with medical tape or gum. A disadvantage of this method is that the microphone is directly exposed to perspiration and makeup.
– On the chest, secured with double-sided tape to both the skin and the inside of the shirt. Try to avoid placing the mic behind any material having more than one layer. This reduces pickup of high frequencies, which results in a flat, “muddy” sound.
Double-miking: In some cases, even a remote chance that the microphone might fail during a live event constitutes an intolerable risk.
For this reason, a news anchor or key presenter may wear two lavalier microphones for redundancy. Only one mic is used at a time; if the primary mic fails, the backup mic channel can be turned up immediately.
Double-miking with lavalier microphones is usually achieved with a special tie clip or bar that holds two microphones. When wireless microphones are used, each lavalier mic must be connected to its own body-pack transmitter.
These two transmitters must be on different operating frequencies, and their signals must be picked up by two different receivers, as discussed later.
