
“I know we need it, but I really don’t want to think or talk about acoustics.” Sound familiar?
It took me more than a couple of minutes to figure this out, but for the vast majority of venues needing acoustic treatment, the success of such projects boils down to three essential questions tied to feasibility. I suspect most consider reflection, absorption and diffusion to be the “big three” acoustic treatment options.
However, those aren’t the three things I’m writing about today. Those are our primary tools, but they can’t even be considered until the feasibility questions are answered.
The Three Questions
At its most fundamental level, effective acoustic design must start with these basic feasibility questions: Where can we put it? What does it look like? How much does it cost?
I presume every person, business, organization, and society would be happy if all rooms, venues, sanctuaries, facilities, arenas, and other indoor environments had good acoustics. Is that really too much to ask? We certainly demand it from lighting.
There are NEC codes and guidelines that define how much light each seat must receive in a building used for assembly. There are no such formal codes or guidelines related to a room’s acoustic environment.
Of our five senses, hearing seems to be the one receiving the least consideration, though some modern research [1] suggests it’s the most important for our overall wellbeing and lifestyle. Why then do our listening environments garner so little respect? I think the answer is at least three-fold.
1) Acoustics is a relatively complex subject that’s poorly understood by most people.
2) Acoustic treatments must be customized for each room – there’s no such thing as a “one size fits all” solution. To reach a room’s desired timbre, different sizes, shapes, locations, quantities, and finishes are required to address different frequency spectrums.
3) Acoustic treatments are perceived as being expensive, bulky, and/or generally unsightly.
So, how do feasibility and creativity help resolve these objections? To answer, let’s look at each question in more detail.
Question 1: Where Can We Put It?
The first feasibility question that needs to be resolved is location. Where can we put the necessary treatment? Can we control architectural shapes and finishes? What areas are strictly off limits? Let’s break down the location question based on the structure of most buildings: floor, walls, ceiling, windows and doors.
Floor. Because there generally are only two choices – hard or soft – the floor can be either a good or lost opportunity. Floors become soft when carpet is applied. Carpet is not a great acoustical treatment, but it’s really good from the standpoint of cost and coverage. You get lots of square footage, and the cost usually doesn’t come out of any acoustical treatment budget.
Pretty much any finish that isn’t carpet is a hard, reflective material, which usually has an absorption coefficient of nearly zero – across all frequencies. So, unless you are intentionally going for a highly reverberant room, hard floors generally present an added challenge to the acoustician. And, because you’ve eliminated hundreds, if not thousands of square feet of carpet, that sound absorptive “work” has to be transferred to other areas in the room.
Closely related to the floor are chairs or pews, which may or may not have soft fabric padding to provide a little absorption. But if the chairs are portable, another set of acoustic variables are introduced; ones that are not always beneficial.
Chairs and pews also provide some scattering or diffusive treatment. If needed, negotiating for padded chairs or pews is an option that should never be missed.

Walls. They’re often a good location for acoustic treatment, but there are often untouchable doors and windows. Basic wall treatments can be buried between wall studs, mounted flush to a wall, or mounted on stand-offs that push treatment a little further into the room, while creating a useful air gap behind.
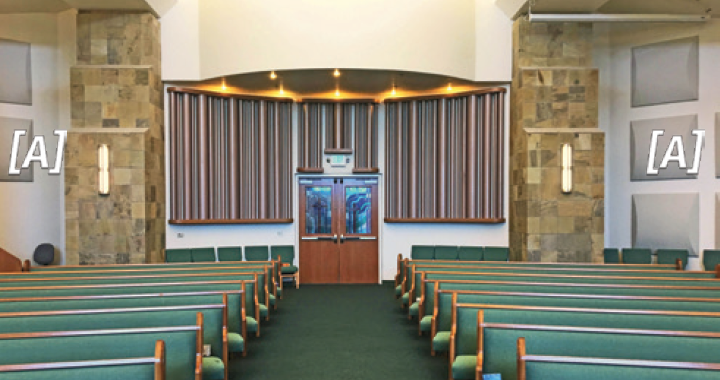
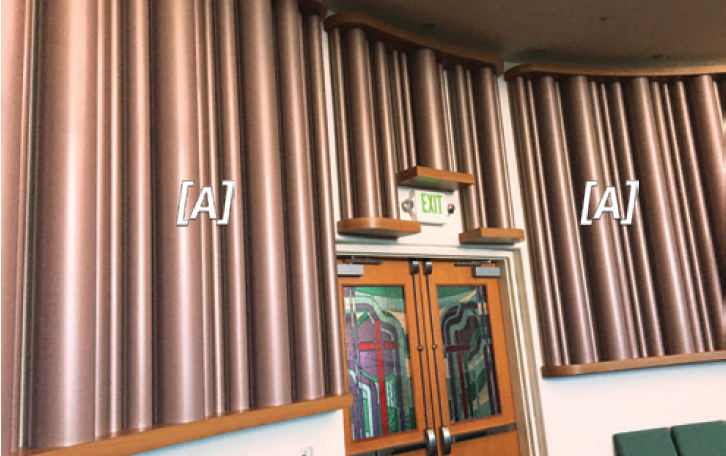
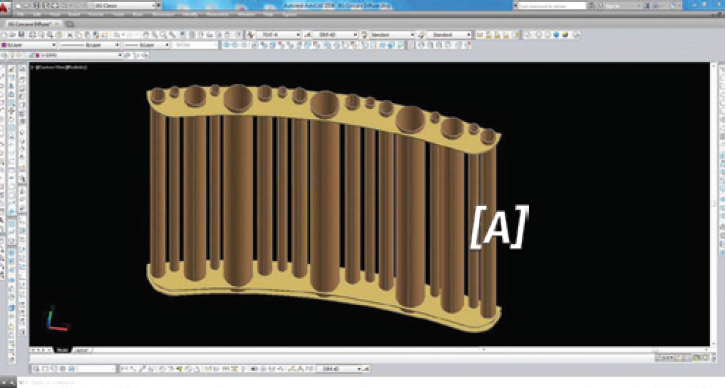
Walls can also be slanted, curved (convex only), sloped, or staggered (Figure 2). Curved wall treatments can be tricky though, because there are few, if any, prefabricated treatment solutions that adapt well to curved surfaces. A custom design may be the only option (Figures 3, 4 and 5).
The preferred treatment and mounting method may interfere with walkways, so careful planning and coordination with the architect must be done. Building codes will dictate the minimum width of an aisle next to a wall. When pressed for space, look for options higher than 7 feet AFF (Above the Finished Floor).
Walls are often the best places for scattering or diffusive treatments. Some scattering can come from architectural shapes and finishes, while other forms will require dedicated diffuser technologies (Again, Figures 3, 4 and 5).
Windows & Doors. Windows can be an enormous challenge because it’s really hard to make a window both transparent and acoustically friendly. It can be done to some degree, but the combination of modified visibility and high cost are usually unacceptable. Most often, sloping or slanting glass windows is the best alternative (Figure 9). Doors can be more adaptable if they aren’t glass and the owner is willing to consider various aesthetically friendly treatment options.
Ceilings. They’re often the best, and maybe the only large surface available to apply treatment. I include high shelf and soffit spaces in the ceiling category too. Shelves can be great locations for hidden absorptive treatment. Acoustical ceiling tiles are another option that I tend to think of like carpet. Not necessarily a great solution, but much better than nothing in many scenarios, and the cost usually is not allocated to the acoustic treatment budget.
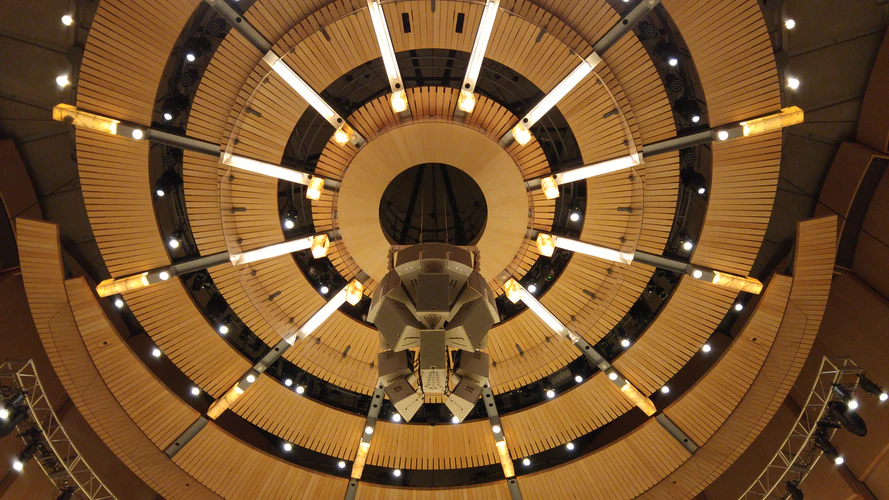
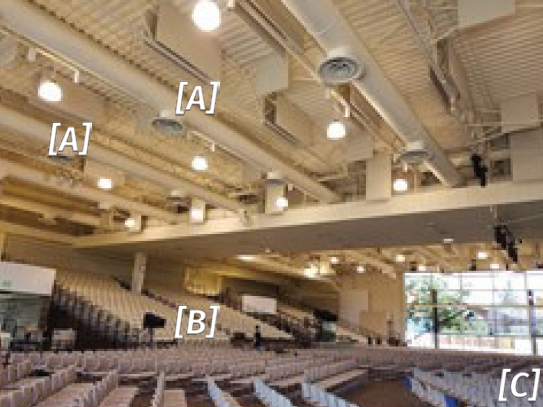
Hanging baffles is one of my favorite ceiling treatment solutions. You get a tremendous bang-for-the-buck with such baffles (Figures 6 & 7). Lapendary panels are another excellent option. Horizontal clouds can play an effective role too, as they can be finished differently on top and bottom, as needed for the applications of the room.
Question 2: What Does It Look Like?
I’m sure we’ve all heard about or have had to work with a “pretty committee.” This group may include the architect, an interior designer, an ad hoc group in the building committee, the owner, or the owner’s family.
There are numerous styles, methods, and techniques a creative acoustician can draw on to help satisfy the aesthetic needs of a project.
The projects shown in Figures 1 through 9 offer examples of many non-obvious, or non-traditional acoustic treatments; each having a valuable and effective result; most taking advantage of creative thinking and architectural cooperation, so they become almost invisible to most people.
Also, it may be of interest to note that I’ve never had an attendee or paying customer complain about seeing acoustic treatment(s). It always seems to be an architect or interior designer that struggle with the idea of seeing some new feature or shape they didn’t think of.
Question 3: How Much Does It Cost?
And lastly, there’s the cost of the various treatments. Answers to the first two questions will often dictate the third. But because acoustic treatment is almost always an exercise in finding adequate locations and space for the treatment, the burden of higher cost may be the only viable route to an acceptable solution.
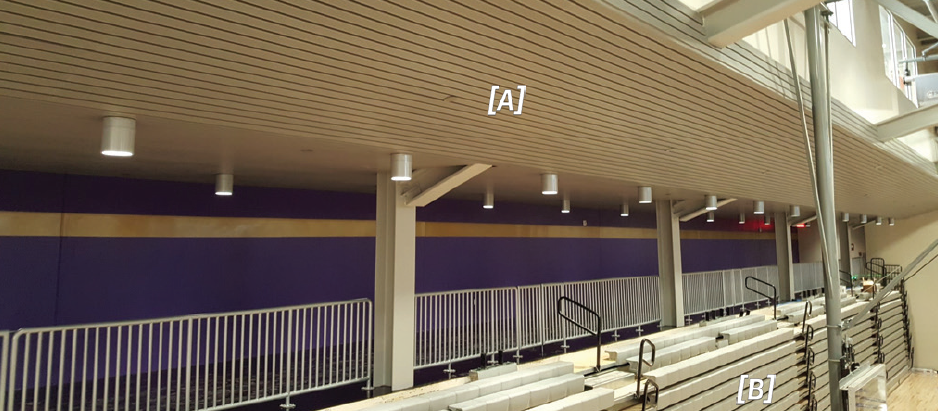
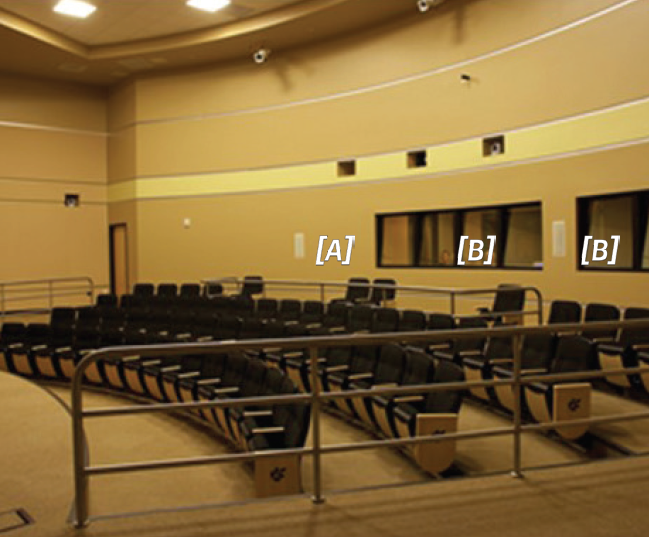
Where doubled, we were able to install 128 ft2 of absorption in a footprint that was only 4 x 8 feet (x 24 inches). Note the bleacher seating in the back of the room [B]. Also see Figure 7, which describes the treatment applied under these bleachers.
[C] indicates one of two parallel glass walls on either side of the building. They run about 90 feet front to back and extend up about 20 feet from the floor. To mitigate the side-to-side flutter echo, an interior, staggered glass panel assembly was proposed but rejected because of cost.
At the low end, expect about 2 to 3 dollars per square foot (ft2) for DIY project materials. The mid-range might cost 4 to 8 dollars per ft2 for commercially available wall panels of various sizes, shapes and finish materials. For higher-end or exotic materials and finishes, using a range of 10 to 15 dollars per ft2 should get you close. And, of course, custom treatments will likely cost more, depending on many factors related to size, materials used, mounting options, etc.
I suspect many can relate to this iron triangle: Location, Appearance, and Cost – have any two with a reasonable outcome, but the third may introduce a multiplier of unknown magnitude. To balance all three requires a creative, interactive design team.
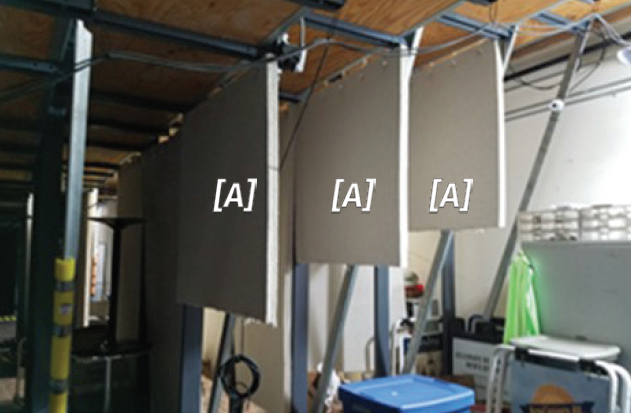
Before treatment there was a lot of low and low-mid reverb buildup under the bleachers. These baffles did a very good job of capturing this residual energy.
Final Thoughts
I would much rather have 60 to 80 percent of my design plans approved and implemented than have 100 percent be rejected because I’m considered inflexible. And, because acoustics is a complex yet inexact science, it often makes sense to err on the side of under-treatment rather than go “all in” on the first pass.
Should a second round of treatment be needed or desired, a process that includes careful acoustic modeling, and as-built RIR (room impulse response) measurements, will provide the most accurate view of what remains to be accomplished.

So, the next time you need to think or talk about acoustic treatment options, remember the three essentials of feasibility: Where can we put treatment? What will the necessary treatment look like? And, how much money do we have to work with?
As the customer, it takes very little understanding of acoustics to have this conversation and discuss these questions. As the acoustician, your ideas and recommendations should reveal every bit of creativity you have to offer.
REFERENCES
[1] Acoustic Bulletin, Our Visual Focus (Part 2) – The Eye Versus The Ear, acousticbulletin.com


