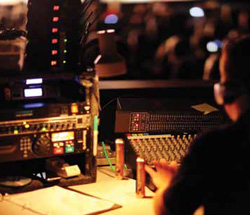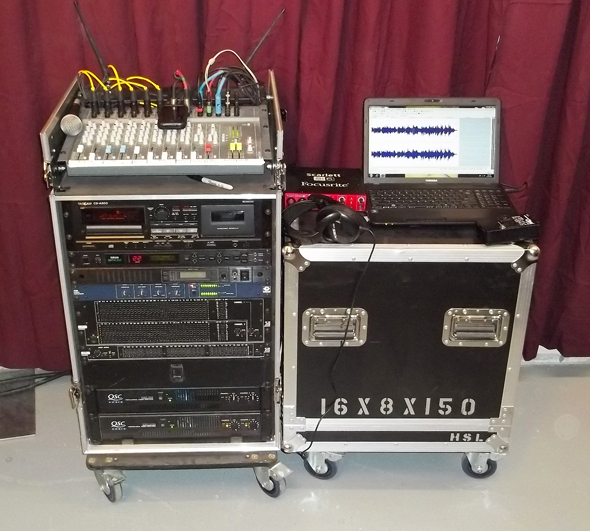
Another common technique is the board tape, which is simply taking a copy of the main left and right outputs and running them to a recording deck.
While it’s easy, there are also downsides, primarily because it’s the live house mix that is being recorded.
For example, instruments may not sound “right” because they were equalized to be heard through a PA in a particular room, and not for a recording.
And a lack of audience response on the recording might make it seem like the band was playing to an empty house.
Even with these drawbacks, a board tape can be a useful reference. Artists can get a good feel for how they performed and engineers can focus in on things they did – and did not – do well with the mix.
Many consoles now come equipped with a set of recording outputs, typically RCA connectors, making it a simple affair to interface a recording deck to the console. Some consoles also have dual outputs on the master section that allow a recording feed to be easily patched from the main outs.
A note of caution: do not use the console’s control room outputs for a recording because if any of the pre-fade listen (PFL) or solo buttons are engaged, because this will route only the solo’d signal to these outputs, ruining the recording. (Unfortunately I’m speaking from experience on this one.)
Making It Safe
Board taping has also long been deployed at corporate events, made for legal purposes such as the recording of a stockholder meeting as well as for other general purposes. Often these recordings are duplicated and sold to those who want to hear the information but were unable to attend the seminar directly.
While numerous companies specialize in the recording of corporate events, and our involvement with them as a tech or engineer may be to simply provide a single board feed, it’s not uncommon at smaller events for us to be asked (many times at the last minute) to record a speech or assembly.
For general sessions at larger corporate events there may be the need for a safety – as the name implies, this is a copy made just in case something were to happen to the main recording, or video audio of the event. It might be recorded on tape, CD, hard drive, or even sometimes on the audio tracks on a spare video deck using video media.

I’ve heard of more than one instance where the safety saved the day when a video deck malfunctioned or the package containing the primary recording was lost in transit.
One technique I use for a safety recording is to place a mic splitter on the podium mic or lavalier mic of the presenter, and then run a split directly into a recorder, bypassing the console completely. This may be the only way to record the presentation if you’re using a small console with a limited number of outputs.
A variation on the board tape is a mixed board tape, where a separate mix of the program material is done specifically for a recording. Sometimes this can be done by simply using the matrix section of the console, feeding it the mix and any additional components (such as the instruments noted earlier) that are missing in the PA mix.
It can also be as complex as running a separate aux send mix for every input and mixing an entire separate program for the recording. This is very popular with bands who want a live recording on a budget, or who want to provide their fans with a live recording right after a show.
I’ve found that monitor desks can be perfect for mixed recordings if the extra outputs are available. And depending on the band’s monitoring requirements, the monitor mixer may also have more time available than the front of house mixer to attend to the recording.
Multiple Feeds
As noted earlier, recording splits from a snake system have been a very common way to interface a live recording rig into a system.
Analog snakes set up for recording should contain transformer isolated outputs, and sometimes ground lifts on every channel, so there will be no noise issues between the live and recording setups.
Remote recording companies can simply tie their lines into the isolated splits and have access to all the stage signals. If no snake split exists, direct outputs from a console can be used to feed a multi-track recording system.
Digital snake systems and networks present an advantage over analog systems when it comes to recording. Instead of having just one isolated output located at the snake head, many digital transport systems have multiple splits that can be placed anywhere along the network, accommodating remote recording, webcasts, broadcast feeds, and any other sends that may be required.
The drawback is that in many cases, the digital signals may need to be converted into analog for the recording gear.
Depending on the transport system protocol, remote recording setups might include digital mixing consoles or digital recorders that can interface directly with the digital snakes, eliminating D/A converters in the signal chain and making hookup as simple as running a length of Cat-5, coaxial cable, or fiber optic cable to the recording console or deck.
Digital mixing consoles bring a whole new wealth of capabilities for recording. Many are designed to interface directly with computer based multi-track recording systems.
Whether configured to do so from the factory, or by using optional output cards, some systems can output MADI, a digital protocol with 64 channels of audio, or ADAT optical, a digital protocol that sends 8 channels down each optical cable.
Both of these are used by many recording systems for multi-channel audio transport. AES/EBU and S/PDIF are two other common digital audio protocols used by many manufacturers to interface recording and playback equipment.
In some cases, a separate recording deck may not even be required, as a few digital consoles have the capability to record via USB to a memory stick or optional hard drives. These files can be downloaded after the show to computer editing programs.
Additional Options
New trends in the market are analog consoles that output audio to FireWire or USB, allowing connection of the console to a computer. These consoles can usually do double duty acting as a live mixer at a show while simultaneously sending audio to recording software in the computer.
Many of the smaller ones are tailor-made for corporate meetings where limited channel counts and the ability to record sessions are the norm, or for engineers and sound companies seeking to get a lot of bang for the buck in gear purchases.
With the ability to interface multitrack recording units easily into live rigs, one new concept that has taken hold is the virtual sound check. Simply put, this is where a multi-track recording is made of the act, and each track is played back into the same inputs. It puts the “band in a box,” so to speak, allowing engineers to do things at sound check like tweaking effects, programming scenes, or checking how the room sounds without needing the musicians on hand.
While used by many on gigs, it’s also a great way to train less experienced/aspiring audio folks, allowing them to spend hours learning mixing techniques and refining their skills without making mistakes at a show. This also comes in handy for veteran mixers who want to become familiar with a new console without the pressures of a real gig.
Live Recording Checklist
No matter how a recording is achieved, certain things should always be done to insure the best results.
—Start with good mics optimized for the recording. While many live mics can make good recordings, some are a compromise between ruggedness and sound quality. Studio mics may be a better choice for certain applications.
—Mic placement onstage is critical. You want to minimize bleed from other instruments as much as possible into each mic. While this may not be a big deal on a simple board tape, it’s critical for making good multi-track recordings.
—You may also have to move a few pieces of backline around, or isolate loud instruments. Plexiglass shields around loud instruments like drum sets keep the drum sounds out of other microphones, as well as limit the amount of guitar/bass amplifier sounds bleeding into the drum mics. Packing blankets between or behind loud amps can help control spill.
—Record tracks with the EQ flat, and with no effects or compression. EQ and effects can always be added in later during the recording mix-down.
—If possible, build in additional time for set up and sound check. Mic placement might take longer, and it’s also good to have the chance to do a test recording listen to the playback to ensure that everything is OK.
—Monitor the recording throughout the performance. Check levels, and verify all the gear is running correctly.
—Check the recording times for the media used and allow ample time to switch flash cards and CDs, or to flip or exchange tapes. Plan ahead and map out points in the show where you will have a moment to accomplish the switch without missing any of the program.
—Label all recordings with the name, date and any other notable specifics, and be sure to do this to both the media and the case to keep it better organized.
Craig Leerman is senior contributing editor for Live Sound International and ProSoundWeb, and is the owner of Tech Works, a production company based in Las Vegas.
