
We’ve featured numerous articles over the years looking at both best practices and effective techniques with cabling and interconnect. This time out, however, we decided to do it a bit differently, reaching out to several veteran engineers and techs (many of whom are regular contributors to PSW/LSI) for their hard-earned tips, nuggets, and tidbits regarding cable care, use, storage, and more that they’ve cultivated over the years. Here are their responses.
Wrapping & Storage
Ethan Winer: The “right” way to wind up microphone cables for storage is always good for starting a fist fight. I prefer neatly rolled with no kinks, and for permanent installs I make sure both ends of every cable are clearly labeled.
Andy Coules: At one of the venues where I work, I noticed that the rectangular plastic crates used to store the XLR cables seemed to get thrown around a lot and ended up broken, usually around the bottom corners, so I sought a better solution. I found it at the hardware store in the form of a plasterers’ bucket – a strong and sturdy round bucket, which is perfect for storing and transporting coiled cables.
Chris Huff: Use electrical extension cord reels to store cables by length. This way, it’s easy to strike a stage and reconfigure it using the shortest cables necessary.
Andy Coules: I’ve always disliked the common practice of using electrical tape to secure cables – it’s wasteful, creates mess and results in the affliction of “gigfoot” (i.e., finding various bits of tape stuck to the bottom of your shoes). So I’ve gotten into the habit of always using reusable plastic cable ties. They’re an efficient and cheap way to keep all the cables tidy (a packet of 100 usually costs less than $10).
Mike Sokol: You’ve got to love the jargon in pro audio. For example: “Pigbag, Snake or Fanout.” What does that even mean? Most of us know that snake is a multi-channel cable typically with 6 to 48 channels,
and that a fan-out is the end with individual XLR connectors split out on separate wires, but about
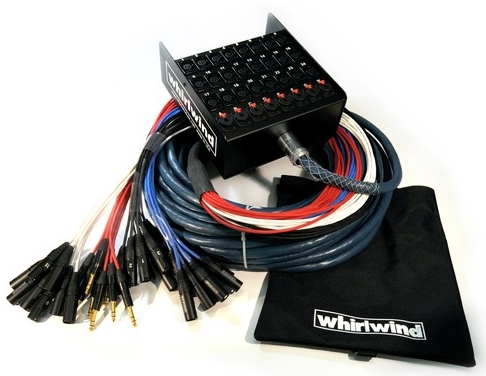
pigbag? It’s a bag to cover the pigtails, those same fan-out XLR plugs (at least that’s my guess as to what the name is derived from).
We used Crown Royal bags back in the day, but now you can purchase an “official” Pigbag from Whirlwind to keep XLR connectors clean and dry even when they’re being dragged through the mud at an outdoor festival.
Jonah Altrove: Cable Wrapping 101 – Cables are made on big reels, so they naturally have a bit of curve to them. If you roll the cable between your thumb and forefingers as you wrap it, you will find it tends to wrap itself. If a cable has been improperly wrapped in the past, it can take a few “training” wraps before it starts to lay nicely. Avoid forcing turns into the cable; it will last longer.
Jonah Altrove: Cable Wrapping 201 – Although it has many detractors, I’m convinced that “over-under” or “the roadie wrap” is the ultimate wrap method. You start like a regular wrap, except every other wrap goes in the other direction and is placed behind the coil in your hand.
This method avoids ever putting a full turn in the cable, and it will unwrap smoothly when given a gentle toss or tug. No spirals!
What I’ve found is that the people who despise the over-under method don’t do it correctly: if you don’t put the backward wraps behind the coil in your hand, you’ll create knots every 3 feet or so when you unwrap the cable. This is annoying, and it’s the reason why a lot of people don’t use this method. But once you get used to doing it right, it’s awesome.
Andy Coules: Multi-core and Cat-5/6 cable often come on a drum that can be unwound to provide the required length of cable for the job, and there’s an inexpensive way to apply the same technique to XLR cables. Just visit the garden department of the local hardware store and get a garden hose cable reel. From there, all that’s needed: attach the first cable, reel it in and then connect the next XLR – female to male – to the first cable and reel it in, continuing the process until there’s enough cable for the job. It’s a great way to neatly store and transport a large number of XLR cables quickly and easily.
Chris Huff: Mark cables for length by using colored tape on each plug or use a Sharpie to write the length on the tape (i.e., 10, 15, 25 feet, etc.).
Jonah Altrove: Don’t ever use the cable itself to tie off the finished wrap. This puts stress on the cable near the connectors, which we all know is the most common failure point as it is. Use cable ties or theatrical tie line. They’re cheap!
Safety & Troubleshooting
Erik Matlock: When troubleshooting a line and determining that the cable is the issue, I highly recommend cutting one end off. Drastic? Maybe. But as long as that cable looks OK, there’s risk of it being used again. This way it won’t get used again until it’s repaired. Make a spot for damaged cables and drop it there. When there’s time, sit down, get comfortable, and go through the pile. Once it tests good, it can go back into inventory.
Craig Leerman: Make sure electrical power is off before connecting or disconnecting power and/or feeder cables. And speaking of feeders, always connect ground wires first, then neutral wires, and finally, hot legs. Disconnect in reverse order (hot legs, neutral, ground).
Stage Wiring & Tidy Work
Mike Sokol: This is my favorite one since it’s gotten me several free beers over the years. Instead of wrapping a loudspeaker cable about the stand in a circular motion, simply let the cable drape and pull the center of it around the stand. The result is super-simple to unwrap during strike, saving at least a few seconds at each stand, which adds up to being finished at least a few minutes earlier for the load-out. And that means you can enjoy a post-gig beer a little earlier, and hence, I have named it the “beer-wrap.”
Ales Stefancic: I have a pet peeve about winding the microphone cable around the stand several times to “make it look neat.” If there’s a mic on a stand, connect the XLR cable to the mic and let it fall freely to the ground on the side of the mic boom adjustment knob, coiling the remaining cable neatly beside the mic stand legs. Then take the cable and go behind the boom, bringing it around on the underside of the boom and securing it on the mic boom adjustment knob. The cable is neatly tucked away, embracing the boom stand, and when the artist decides to take the mic off the stand, they can do so quickly and gracefully.
Karrie Keyes: Label everything – stage boxes, mic cables, microphones – on each end. Detailed and accurate input lists should be available for all departments.
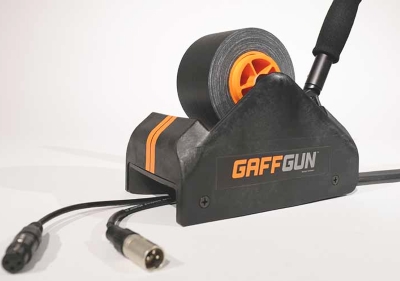
Andy Coules: If you’re not aware of the Gaff Gun, you should be. It’s a most excellent way to tape down cables quickly while saving strain on your knees and back.
Craig Leerman: With stage monitors, make sure that there’s enough cable slack to move the wedges after they’re positioned because changes are the norm. We route the monitor cables around the perimeter of the stage so the cables aren’t running across the performance area, minimizing trip hazards.
Craig Leerman: Unless all stage inputs plug directly into the console or a single stage box, we make a patch list of all inputs. It contains the input name, sub snake channel, main snake or stage box channel, and FOH and monitor console channels. On multi-act gigs, a patch list can be the difference between chaotic and organized set changeovers.
Chris Huff: Be sure to always carry/have available at least one spare cable in a couple of types (instrument, XLR, etc.) and lengths.
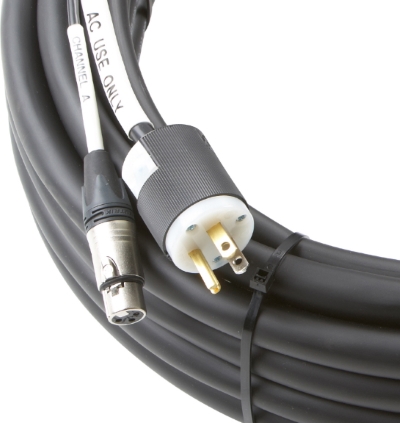
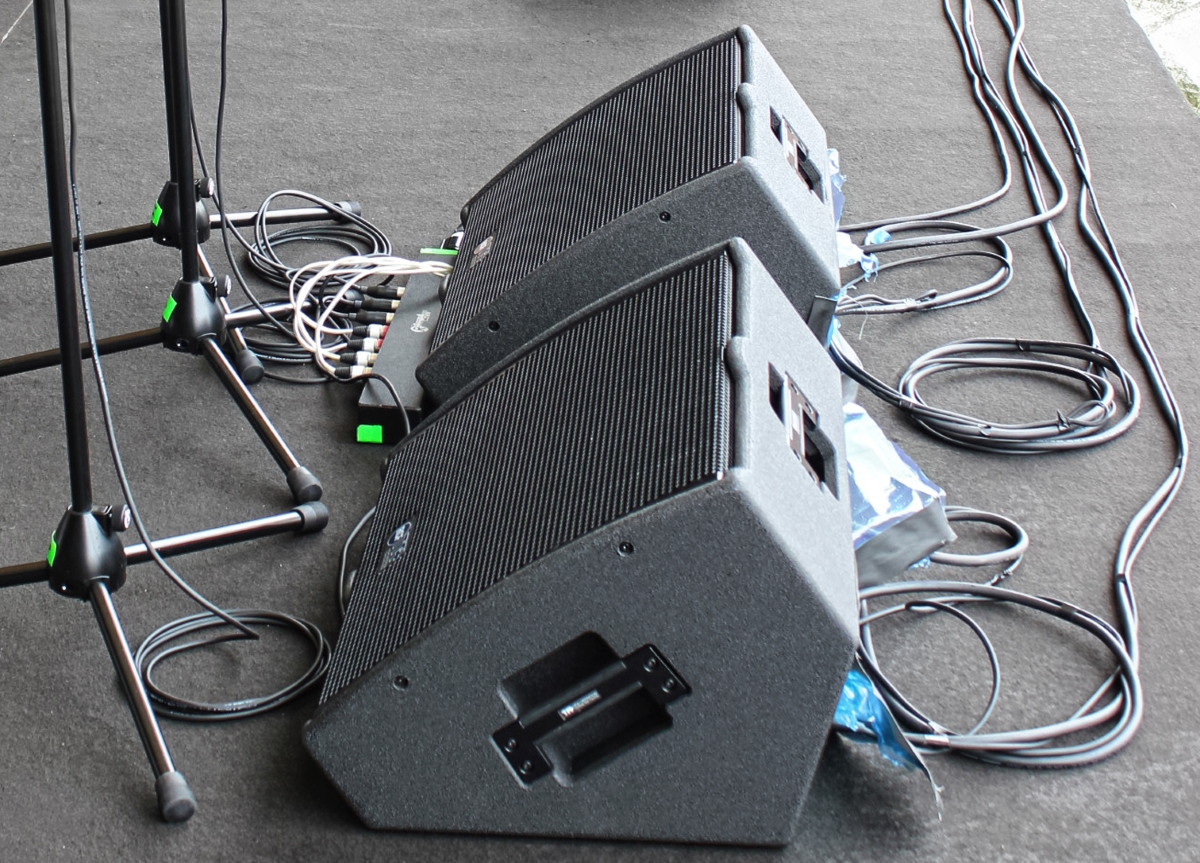
Craig Leerman: Powered loudspeakers eliminate some cabling needs, but they still need both AC power and signal connections to operate. However, several manufacturers have developed alternatives. For example, Rapco Horizon offers the AC-Audio Composite with an XLR connector/cable for signal and an IEC-to-Edison connector/cable for power in a single jacket. This means just one cable run, and particularly with powered monitors, it can result in a cleaner, less cluttered stage.
Karrie Keyes: Keep cables clean and well repaired. Immediately pull and mark bad cables as found. Repair as soon as possible or get rid of them. And at down times, test cables, stage boxes and snakes with a Whirlwind Q Box or Sound Tools.
Craig Leerman: Have a few different lengths of signal input cables to work with in order to reduce clutter. My company stocks lengths of 6, 15, 30, and 50 feet, and to make it easy to grab the right-sized cable at a show, colored heat shrink indicates the length of each one. We also only mark the male end so there are no colors at the mic end that would draw attention to the cable, especially when on camera. With larger diameter loudspeaker and power cables, there’s enough room to label them with their actual lengths.
And One For The Road…
Mike Sokol: XLR cables only go one way, with microphones having outputs and preamps having inputs. And there are outputs on the console that feed inputs on the loudspeakers or power amplifiers, and so on. But how do we remember which way is which without looking?
Here’s a simple way to think about it: the pins always point in the direction of signal flow. So if the XLR jack or plug is an output, it’s a male connector, and the pins will be pointing outward. And if it’s a female input connector, the pins will point inward.


