
If you’ve mixed for a broadcast or stream, chances are high that you’ve had complaints about how it sounds. Virtually no one gets it perfect the first time. I’d guess that many of the complaints center around the level of the mix and the balance between the speaking mics and the music parts of the worship service.
It’s even more difficult if you’re trying to do double-duty with your front of house console, because a lot of the energy in a live mix comes from the contrast between loud and quiet sections of the music.
The streaming mix can’t have a lot of dynamic range or people on the other end complain that 1) it’s not loud enough; 2) it’s distorting during worship but the preacher sounds fine; and 3) they have to turn their devices up and down numerous times. None of these are optimal.
Your first instinct might be to patch a stereo bus compressor on the stream’s output, thinking it will help keep the levels more even. But if the mix going into that compressor isn’t treated properly, it can make things worse. Punchy drums and vocals in front of the mix can cause the compressor to behave badly – like it needs a time-out.
Oh yeah – time. We need to understand the attack and the release time on the compressor.
The Right Timing
A compressor responds to the input signal to know how to push down the output when the input goes up. The attack time is how quickly or slowly the gain reduction responds to that input signal going up. The release time is how quickly or slowly the compressor’s gain reduction goes back down, or recovers, after the input signal goes back down. On paper, it’s simple enough to understand, but a music mix is not simple in the way it interacts with a compressor’s attack and release times.
Musical signals have a blend of percussive elements, like the smack of a stick on the drums, the hammer on the strings of the piano, or the pick click from an acoustic guitar, and sustain elements, like a distorted electric guitar playing long chords, a synth pad, or the sustained notes on a piano. Add to this vocals that have to sit on top of the mix and it makes for a signal that’s really tough to compress well without one instrument or voice creating unwanted dynamic changes to the other elements.
To test out how the compressor on the stereo bus can crash and burn quickly, set up a mix with virtual sound check, and mix it like you normally would with punchy drums, and make sure your vocal is way in front of the mix. If your console has a compressor available on the main output, enable it and set the ratio to 4:1. The attack and release times matter some, but we’re aiming for making it sound bad right now to prove a point, so don’t worry too much about those yet.
Pull down the threshold until you get 2 to 3 dB of compression, and then listen to how the balance of the mix changes. Now push up the drums more and notice how the compressor behaves. Each drum hit is going to make the stereo bus compressor push down harder, making the other elements “pump.” Now return the drums to a normal level and push up the vocals. When the voice comes in, you’ll hear the other instruments get ducked down.
Now you can hear that merely throwing a compressor on the mix isn’t a very elegant solution.
Drums
One thing you can do to help this, whether you’re mixing your broadcast from the same console as FOH or on a dedicated console, is tame the transients of the drums with compression on the input channels. The goal is not punchy compression that sounds great at FOH with a loud PA and subwoofers; we have to use fast, transient-grabbing compression.
When employing a fast attack time for the compressor on the drums, it quickly turns down the transient of the drum hit. Normally, this is not the sound I prefer. But with discretion in how much gain reduction is used, and the application of enough makeup gain, it can work well enough so that the compressor down the line doesn’t pump. This result is that the mix can be louder yet more under control with dynamic range.
To compare and contrast two drum compression styles on recordings, look no further than two John Mayer albums, Heavier Things and Continuum.
On Heavier Things, it’s very “loud” but there’s no real punch to the kick and snare. They sound fine and trick your ear into thinking that there’s punch and snap, but when you listen back-to-back with a song from Continuum, you’ll hear how the overall level is a little quieter, but when you turn up your loudspeakers, you get all the joyous punch and impact from those drums.
While I gush over the drumming and engineering on Continuum, it takes a lot of care and fine-tuning to make a recording sound like that. And those musicians are (probably) not your musicians. And they didn’t do all that live. Just remember that we can take our sounds more toward the direction of Heavier Things. Take care to make your snare bright enough and use the makeup gain so that it doesn’t totally disappear.
If you have plugins available, one compressor type that works very well for fast attack times is the Universal Audio 1176. Its slowest attack time is 800 μS (microseconds), or 0.8 milliseconds. That’s stinking fast for a compressor. And the thing that set it apart when it first came out is that it could handle having an attack time that fast without sounding too funky.
Now, with attack times that fast, a lot of gain reduction can make almost any input sound thin or crushed. But if you don’t take the compressor further than it’s meant to go in terms of gain reduction, it can be brilliant for drum tones, and more importantly, the way the downstream compressors behave.
Vocals
The other mix elements that tend to make a stereo compressor pump are the vocals. They’re almost always the most important input in the mix, so naturally they need to be on top of the mix. But if they step too far out in front of the mix, the stereo bus compressor “grabs” them first, pushing other things down. Compression on vocal input channels is important for live mixes, but for streaming mixes, you may want to compress a little more than you’re used to.
Several things can happen when compressing vocals harder. The first is that we can go too far, and the breaths get louder than the words. That’s definitely a distraction, so if you run into that, roll that threshold up a little bit. If the compressor on the vocals makes them feel crushed, try a different attack and release time. I find that RMS mode is more forgiving on vocals while still giving the dynamic range and tone control needed to keep vocals locked in place.
Once the vocal’s compression is dialed in on the input channel, you’ll likely have to ride it up and down with the dynamics of the song. The target to shoot for is called the “vocal pocket.” The way to determine if the vocal is “in the pocket” is if it sounds out in front of the mix when it’s in mono but feels slightly tucked back in the mix when it’s in stereo.
If you’re mixing in headphones, this vocal balance is especially tricky. Headphones and in-ear monitors provide so much detail that it can be more difficult to get balance right. My approach to address this is to mix in mono when monitoring in headphones. Check stereo occasionally to make sure that any panned instruments or stereo effects aren’t out of balance, but sticking to mono and keeping the vocal just in front of the mix will produce more consistent results that compress well together.
Bus
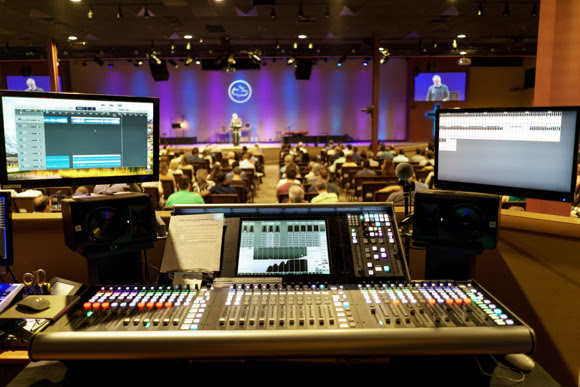
Now that our source material is a little more tamed, we can finally get to setting up the stereo bus compressor for the streaming output, whether it’s a matrix or group on the FOH console or a dedicated broadcast mixer.
You can set the final output compressor to be a limiter, catching any stray transients and keeping the levels up without exceeding 0 dBFS on the output. To do this, set the attack and release times very fast and choose a high ratio – 10:1 or higher. Be careful not to push this limiter too hard. Too much gain reduction with a single compressor or limiter can make the mix sound strange.
My preferred method is on the opposite end of the compression spectrum. I like to choose a very gentle ratio – 2.5:1 or lower, maybe even 1.5:1 – and set the attack and release times very slow so the compressor acts like a gentle fader movement. An attack time of 50 ms and a release time of 1500 ms works very well for taking care of the overall level changes of the streaming mix, especially the difference between the level of the music and the speaking portions the service.
Employ these tips and you should have a much easier time with stereo bus compression for broadcast mixes. Whether you’re setting up your output compressor with a low ratio and slow attack and release times to act like a gentle fader throw, or you’re pushing into a limiter for maximum levels, you’ll get much better results when treating input channels with the stereo output compressor in mind.