I like using spatial effects to create interesting moments in the music coming from the stage. A well-chosen reverb that supports the mood and the message of the musical content is the one “magical component” I’d have the most difficult time giving up if forced to restrict my workflow or gear options.
Reverb is also probably also one of the most qualifying distinctions between digital consoles. Getting EQ to translate from one console to the other is usually a much easier task than mimicking a reverb setting from one desk to another.
When I have time and the situation allows it, I provide myself with a palette of various spatial colors – drum room, snare plate, long drum verb, vocal plates and halls, tap tempo delays and slapbacks – that are all carefully chosen, equalized, sometimes dynamically processed and with their parameters linked to controlling encoders with meticulous deliberation.
I like prepping parameters of these spaces for songs with scene/cue/snapshot recalls and then manually adding them to the mix, following the flow of the song, the response of the room and the energy of the performers and the audience. But what happens when I don’t have the time to set it all up?
Avoiding The Rabbit Hole
In my Guerrilla Mixing course, I explain the practice of minimizing everything down to its core, utilizing the bare essentials to get the job done efficiently and as quickly as possible since time is often such a lacking and precious resource. Believe me, it’s a rabbit hole that entices many a mix engineer.
All too often I witness engineers trying to set reverb decay times for a “perfect” snare hit while the vocals are missing in the mix and beautiful solos go unnoticed forever. So if there’s not enough time to even do a decent line check, how are we supposed to do a complex setup of various spatial effects and have them under control while still dealing with monitors on stage? The answer: we don’t.
In these cases I recommend using only one reverb. There are definite limitations to this approach, especially in terms of the tools at your disposal to match the content from the stage.
But instead of focusing on the negative aspects, let us inspect the positive ones:
• You only have to worry about one send-return and one mix bus. This is a huge time saver. Setting up three FX slots rather than just one can be time consuming, and in the heat of the moment there’s a bigger chance of things not being routed and/or adjusted properly.
• A single reverb can act as a “glue” for the mix. Since the listener gets the feeling of all audio signals coming from the same space, it helps sell the sonic illusion of the sound being propagated from a singular spatial point.
• It can add another level of entire mix EQ. If all of the content is being augmented with the same reverb, then changing the EQ on the reverb can be viewed as another tool to influence the entire mix. Consider the option of using reverb return channel EQ to match musical content (darker for slower songs, brighter for up-tempo music).
The question: what are the settings that competently cover all musical signals and genres? The short answer: there are no such settings (at least that this humble student of audio knows of). But what I propose is utilizing the settings of one reverb and adapt them to best match the music content.
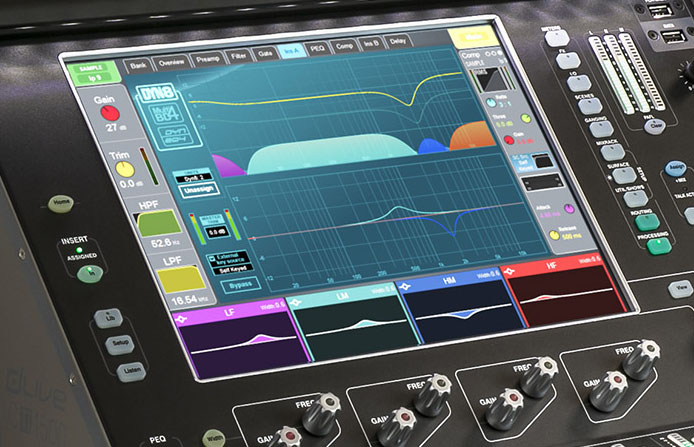
Most digital mixers have user-defined encoders, and when I’m using only one reverb, these get populated with at least two of the reverb settings – pre-delay time and decay (or reverb length).
Going About It
My personal choice with this approach is to usually start with a plate reverb and, if possible, turn down the early reflections (ER) slightly (or adjust the ratio in favor of the tail, depending on the controls available). Since I will be applying the same reverb to a lot of channels, turning down the ER helps reduce the masking of the direct signal and keeps transients coming through better.
Next I set the decay time at about 1 second and pre-delay at 20 to 40 milliseconds (ms). A fair amount of pre-delay helps in retaining the clarity of the original signal. This slight separation of the effect works wonders in keeping a clear, punchy mix, especially for the vocals.
This is my “average” setting used as a starting point to determine the quality of the effect and its interaction with the musical content. The effect return channel gets a fair amount of high-pass and low-pass filtering applied because I don’t want to muddy the low end, and I’m also not a big fan of crispy reverbs. However, that (and most of these settings) is a personal preference more than a hard rule.
When we get to slower tempos, the pre-delay time gets raised substantially, as does the decay time. In these situations I consider the pre-delay time as an additional blended delay effect, so it gets raised to 80 to 120 ms and sometimes more, depending on the musical content. With the delay time, I also raise the length of the delay time, usually to a value above 2 to 2.5 seconds.
As a result, by adjusting the parameters of only one effect, I can quite successfully track various musical content. This allows me to pay more attention to what is happening on stage, knowing that I only have four parameters to work with – pre-delay, decay, one mix bus and one FX return channel.
Using reverb or any other effect in a mix will always be a matter of personal preference and taste. My point is that even severe limitations can be quite “freeing” in the sense of reducing the number of choices we have to make and really utilizing the tools at hand to support the performance and enhance the message.

