
When you’re all finished tuning a PA system, how does it sound out front? Fantastic I hope! But maybe we should also ask ourselves a follow up question: “How does it sound in back – behind the PA?”
I’m sure, at one time or another, you’ve felt the pressure of having to tune a PA system in a very small window of time. Maybe the truck was late getting to the gig, or the lights have been floating a foot above the stage for the past two hours, keeping any other work from happening. (By the way, this is where an old audio engineer inserts an equally old joke: “Why are lights made of aluminum these days? Because if they were made of steel, they’d rust waiting to be raised to trim height”).
Whatever the reason, we’ve all had to “cowboy in” a quick system tuning in way less time than we’d like. When it happens, we tend to focus on the meat and potatoes tasks first and deal with the less imperative tweaks later. If we can get the main L/R arrays tuned up and time-aligned with the subwoofers, and the front fills and side arrays making some kind of noise, we can do a show even if it’s not a work of art.
But what happens when you’re moving so quickly you don’t pay enough attention to the overlap frequencies between zones, particularly in the low frequency spectrum. If you don’t carefully consider the buildup of low frequencies that occurs when the subs are added to the mains, things can get hairy behind and to the side of the loudspeaker clusters.
And this just happens to be where the artist/band will be hanging out during the show (not to mention a bunch of crew members who are experiencing their fillings rattling out of their teeth while they draw straws to see who gets to put a chain motor in your bunk). The same problem of low-end buildup can also take place when side arrays and front fills are added to the main arrays.
The Road Map
My audio mentor and system optimization guru Dave Lawler (“Dr. Dave”) taught me a very valuable lesson that I still use today as my “road map” when tuning systems. He said, “Start with the main arrays, get those tuned and covering the main part of the room nicely with full-frequency response (let’s say 60 Hz to 20 kHz), time align and add in the subs, then “feather in” the other portions of the PA (side arrays and front fills) to supply only the frequencies that are missing in their coverage zone (usually 500 Hz to 20 kHz) while also reducing frequencies below 500 Hz in a systematic way to avoid buildup of low frequencies between loudspeaker clusters and on stage.”
Here’s a step-by-step rundown of how to do just that:
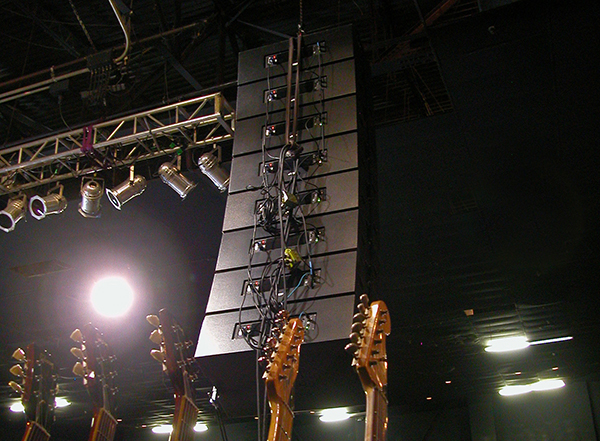
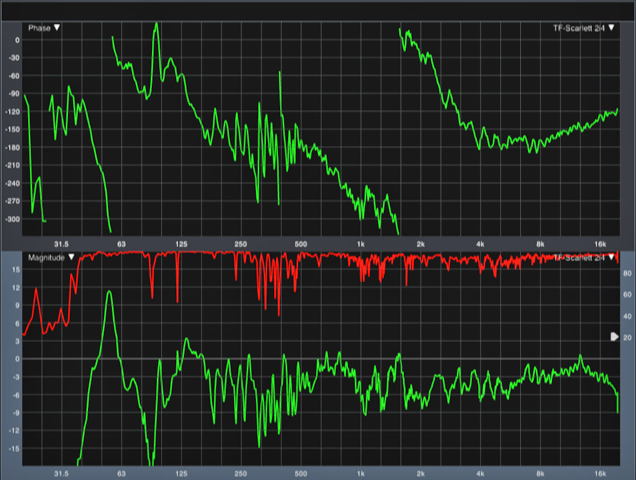
Step 1: Using Rational Acoustics Smaart, Meyer Sound SIM, or other FFT (fast Fourier transform) measurement software and a measurement mic, take a measurement of one side of the main PA on-axis, then store that frequency trace (Figure 1).
Step 2: Take the mic over to the overlap area between the main and side arrays. Start by doing a quick time alignment of these two zones, then move the mic once again to be on-axis with the side array.
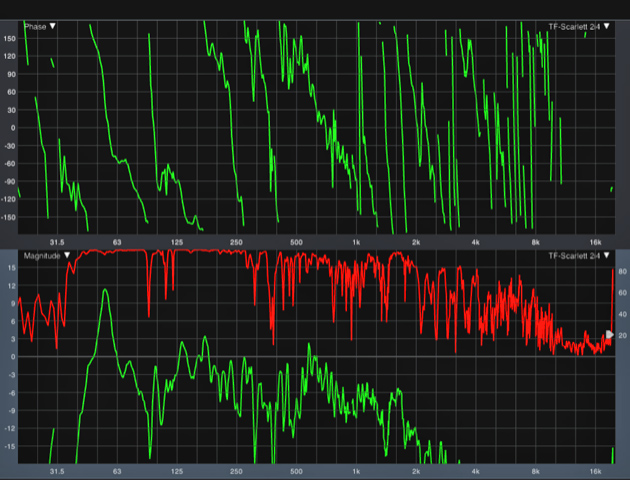
Step 3: Turn on only the side array, grab a quick Delay Finder measurement, then turn on only the main array and store a frequency trace. You should notice an obvious deficiency of higher frequencies and only the off-axis lower frequencies (Figure 2).
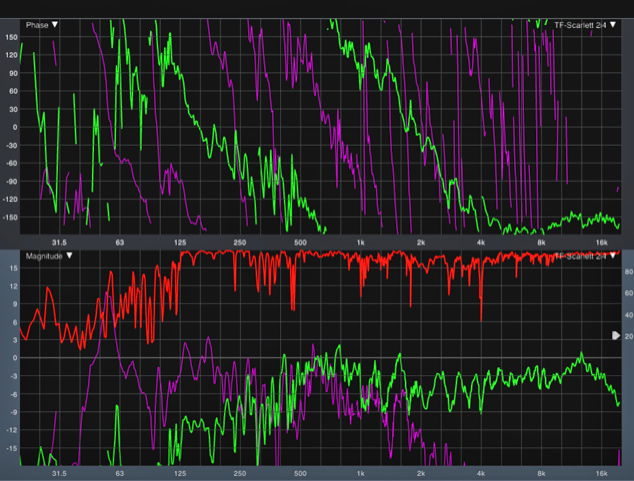
Step 4: Mute the main array and turn on the side array. Looking at the stored trace of the main array you just took from this position, use whatever EQ tool you prefer to high pass or EQ away the low end from the side array until the remaining high frequencies “join up” with the stored main array trace and fill in the clarity that was missing from the main array (Figure 3).
Step 5: Turn on both the main array and side array, and there should be a full-frequency curve that looks very similar to the trace of the main array you stored earlier in the middle of its coverage area.
This same technique can be used when adding in front or any other fill loudspeakers (including delays). I’ve found, more often than not, the “problem child” of low-end issues on stage originates with the front fills and the amount of low-frequency energy that comes off the back side of these loudspeakers and rolls around on stage.